Monday, December 12, 2011
Week 8, Session 8 - Bounce
Using the simple ball rig, this lesson focuses on adjusting timing for keys, tangent angels and tweeking animation in the key and value boxes using *= and /= short cuts in the Graph editor, as well as importing animation from other files.
This is my final "Bounce2" animation for Maya Springboard.
Enjoy,
Max

Week 7 - Session 7 - Circle
Objective: Deepening our understanding of the graph editor as well as using motion paths.
How: Animate a ball rig moving in a perfect circle.
My method: I typed in respective translator data to key the ball in four extreme points of the circle using (5,0,0) (0,5,0) (-5,0,0) & (0,-5,0).
Spaced the keys,
Used clapped tangents
THEN, I created a nurbs curve Circle in the same size I wanted my motion path to be. Next, I put that circle in another layer which I made a reference layer.
From there I could refine my motion path with the circle curve as a guide.
I did hit a snag when I realized I hadn't imported the ball rig, andhad animated a plain sphere. The result would have been the same but I'm a perfectionist. So, I copied the keys and put them on a ball rig.
The trouble was the center/ pivot points were different so I had to move the new graph editor lines collectively for the center to be right where I wanted it.
Thumbs up for learning to fix problems!
Thanks for reading,
Max
Sunday, November 27, 2011
Week 7 - Session 6
Assignment 6: Our first animations.
Objectives:
1) Move an object for 100 frames.
2) Become familiar with the Graph Editor
and
3) Experiment and have fun.
Here's my first simple animation:
Figuring out the rotation was tricky but not complicated thanks to the graph editors repeat animation feature.
Thanks Graph Editor! *Wink- thumbs up- & smile*
Thanks for watching,
Max
Wednesday, November 23, 2011
Week 6 - Session 5
Assignment 5: Lighting and Rendering
Objective: Add lights and render your scene. Simple enough in theory, but for a perfectionist recreating his immediate surroundings this took some focus.
Here are my camera shots with lighting!


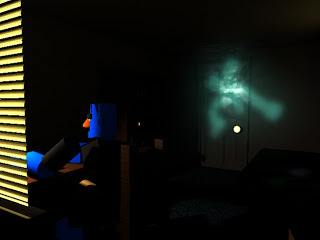


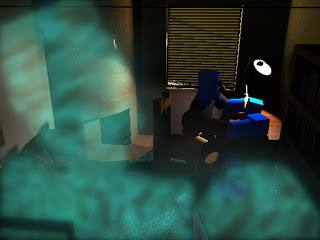
Thanks for reading,
Max
Objective: Add lights and render your scene. Simple enough in theory, but for a perfectionist recreating his immediate surroundings this took some focus.
Here are my camera shots with lighting!

Lights: (3) Area lights. on in the lamp, and one inside each window frame
New Lamp, like the one by my computer.
Also take note of the blinds over the window.

The face sattering was a surprise, also my character has new skin and eyes, they where Mental Ray shaders and I didn't render them right so I replaced them. I'm very happy with the ghost though; (1) point light.

Blinds! Uh oh, and generally too dark; except that door knob, bam!

Woah, this camera gets nothing.
Two new camera angles in reaction to the lighting.

This one fixes the problem with the blinds in camera 3.
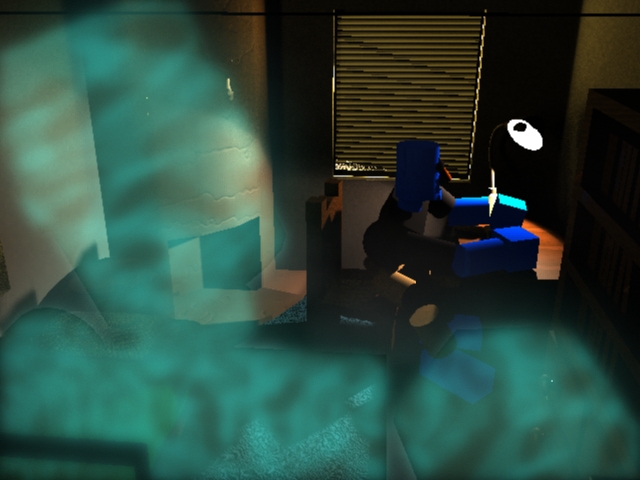
This one gets all the window and lamp light but you can see a piece of cylinder in the lamp that needs fixin'.
Thanks for reading,
Max
Week 6 - Session 4
Assignment 5: Basic Shading
Objective: throw some shades on your set and experiment with how to manipulate them to create different effects.
Here are my camera views with shaders:

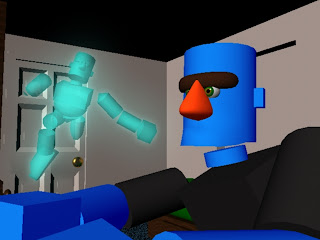


Objective: throw some shades on your set and experiment with how to manipulate them to create different effects.
Here are my camera views with shaders:

Marble was fun

Love these eyes, ghost, and door knob.
Also went for a Muppet feel on the skin.

Now the bed is round + notice the new end table by the bed I added for this assignment

Khaki pants.
Shaders were very fun to tweek and try different things on. Having a set based on my room made it challenging because I knew exactly how it should look and I really tried to capture each surface as it appears in reality. It gave me a solid goal; to recreate what I saw, and I got as close as I could and didn't stress if it wasn't perfect.
I also experimented with Mental Ray shaders. They look great but also caused some problems later on.
Thank you for reading,
Max
Thursday, November 17, 2011
Week 5 - Session 3
Assignment 3: Cameras
1. Build a set
2. Poses your Character in the set
and
3. Place three cameras in the scene and lock their positions
Here are the three pictures from my cameras perspective.


This set is based on my room at home. Though originally I wanted to put this clubbing high roller character, as I introduced him before, in a night club or bar, I decided it would be easier and more rewarding to look for a closer source of inspiration. I'm glad I did to, looking at real furniture and construction gave me plenty of realistic details I would have had trouble designing in the time I had.
I actually really enjoyed modeling the furniture. The hardest one was the bed's mattress. I just wanted a rounded rectangle but it had to be the right kind of round. It took me a few attempts to get the edge loop tool to give the proper effect to the round render shape from the "2" key but I was happy with the result; until it didn't show in the render.

The door is surprisingly easy to make actually, using the extrude tool from the wall. Of course it cant be opened that way, but in the future I'll be sure to extrude the patterns of doors to there own shapes.
Thanks for reading,
Max
1. Build a set
2. Poses your Character in the set
and
3. Place three cameras in the scene and lock their positions
Here are the three pictures from my cameras perspective.
Camera 1

Camera 2

Camera 3

and I added a fourth camera just for practice.
Camera 4

This set is based on my room at home. Though originally I wanted to put this clubbing high roller character, as I introduced him before, in a night club or bar, I decided it would be easier and more rewarding to look for a closer source of inspiration. I'm glad I did to, looking at real furniture and construction gave me plenty of realistic details I would have had trouble designing in the time I had.
I actually really enjoyed modeling the furniture. The hardest one was the bed's mattress. I just wanted a rounded rectangle but it had to be the right kind of round. It took me a few attempts to get the edge loop tool to give the proper effect to the round render shape from the "2" key but I was happy with the result; until it didn't show in the render.

Oh well, it shows up later.
The door is surprisingly easy to make actually, using the extrude tool from the wall. Of course it cant be opened that way, but in the future I'll be sure to extrude the patterns of doors to there own shapes.
Thanks for reading,
Max
Wednesday, October 26, 2011
Week 5 - Sessions 1 + 2

Session 2 assignment: Hierarchys/ Parenting/ and Modeling polygons.This is my basic character, I call him Francis Stein. I took inspiration from Frankenstein in honor of Halloween coming up next week.

Session 1 Assignment: Shelf/ Modeling basic NURBS shapes/ Transformers/ getting around inside Maya.
The Shelf was provided in the assignment.
Subscribe to:
Posts (Atom)