Wednesday, August 8, 2012

AM Class 3 Week 5 + 6 - A Bit of a Stretch

Well, it's been a couple of weeks and boy have things happened.

1. The last week of Critical Thinking Class didn't kill me with three consecutive papers, and I found out today my final grade for the class is an A. 
2. Footloose the Musical is going strong and selling out.
3. Got cast in my next show, the Fantasticks, with an unlikely part, Mortimer the Cockney Native American.
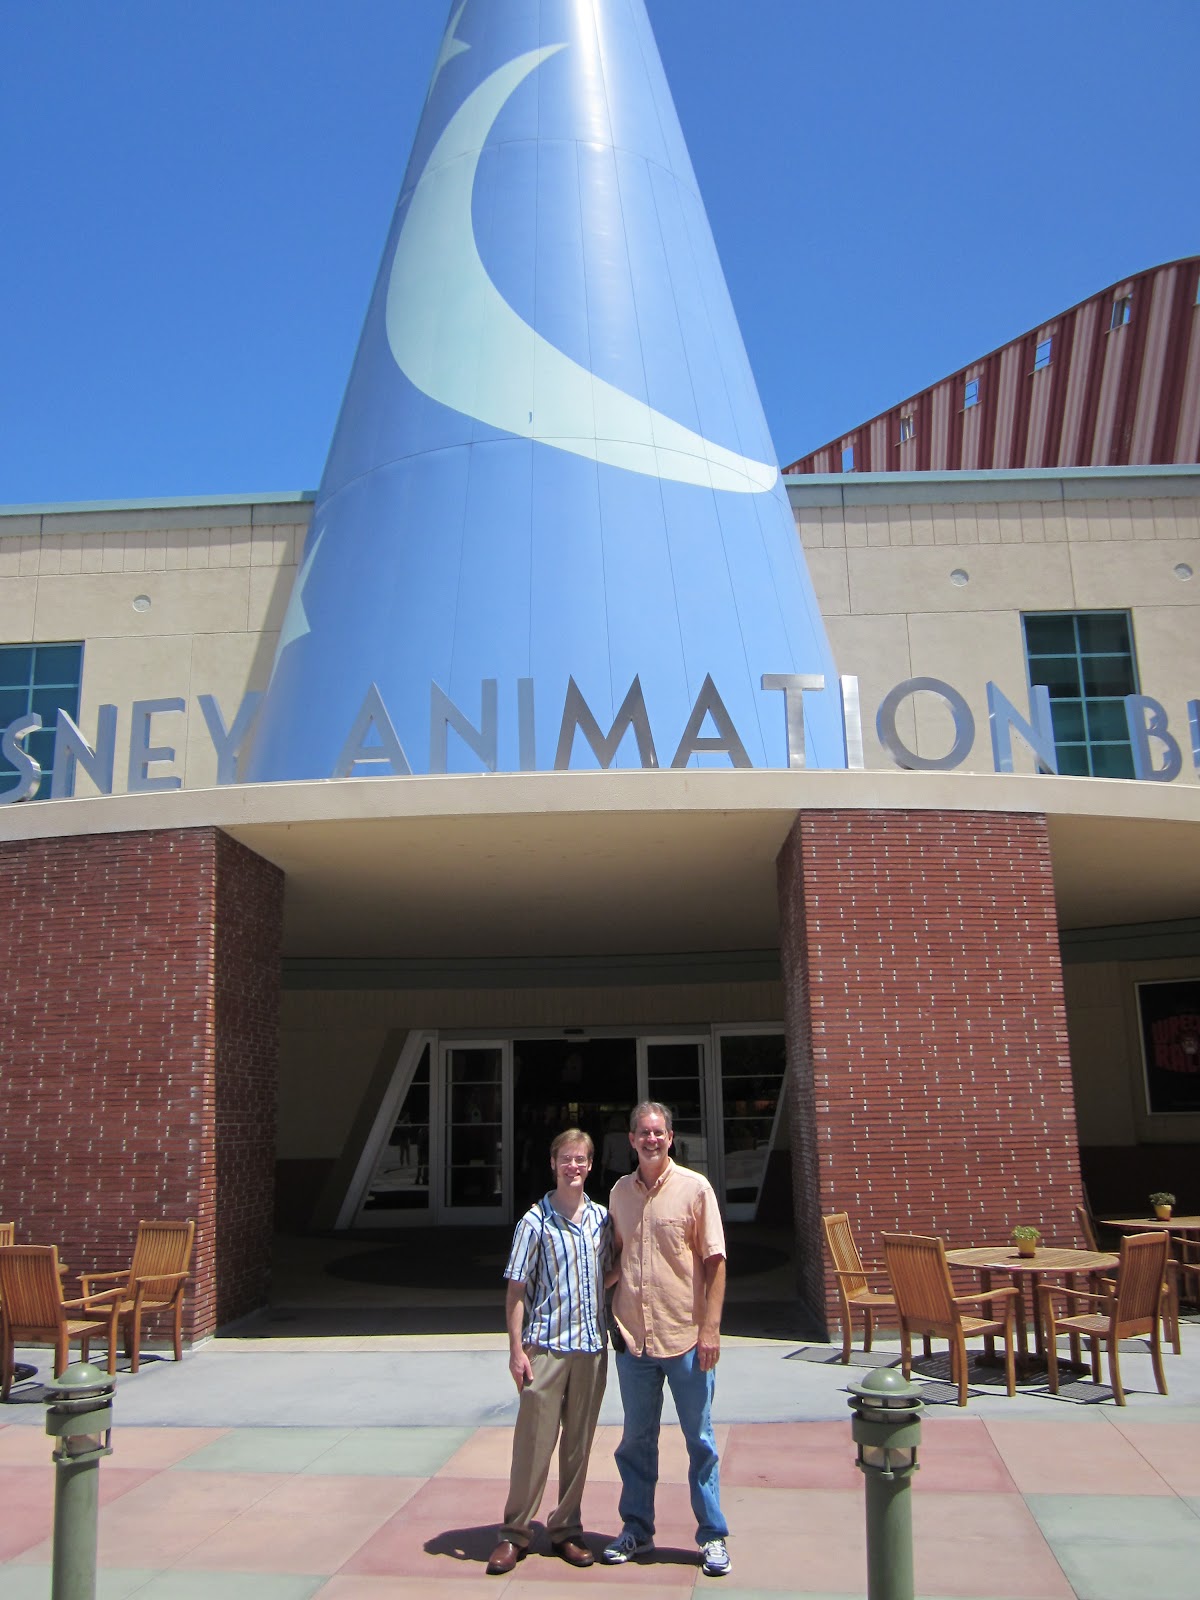
4. And best for last ... Thanks to his amazingly talented son, who is also staring in Footloose, Chris Buck, the Director of Disney's upcoming feature "Frozen," lead me on a personal tour of the Disney Animation Studio in Burbank!
Geeking out with my guest pass.
Me, Chris Buck, and the Studio
And now that I'm free of classes, motivated, and inspired here's my animation from the past two and 1/2 weeks.

Here's my current work in progress:

Biggest note- SPACING

Two solutions I was given by my mentor:
1. Change the spacing by altering the "Poses." Have them favor one side of the action.
2. If spacing issues persist, Move the keys around, take away inbetweens.

One instance of the spacing issue is in the steps. They must land faster, like the character's weight is shifting into a fall that the foot needs to catch.

Submitted Blocking-Plus Pass:

...and as a Bonus here's the Squash and Stretch blocking that didn't get submitted... ; )

(Bit of a Stretch don't you think?)

The AM news week 6 featured a great example of "cartooney" style animation and I was inspired to give it a try. However, my peers reeled me back in (Pun intended.)

and...

Submitted Blocking (11 Story Poses) :


If bare bones blocking was the goal some of these poses could have been removed , but I was just thinking "under 12 poses."

Some things I learned from the Tour:
1. ~"Keying everything can get messy"
2. Cal Arts is back on my radar as a college to apply to.
3. You don't have to be a writer to be a story artist if you can build on a small idea and make it entertaining.
4. Blocking a shot is more than building fixed poses, it's breaking down movement. 
5. (Reinforced) You have to know the broad basics to do subtle acting.  

Lastly, here's some reference for Shot 3 - Tai Chi:
The goal is to use spacing to vary the motion and engage the viewer through the whole shot.
Balance will be important.
Fluid overlapping actions.
Breaking down a motion instead of "Posey" animation.

Thanks for stopping bye,
--Max : )

Sunday, July 22, 2012

AM Class 3 Weeks 3 + 4: Inbetween

Here's my submitted Shot for week 4.


What I learned: 
#1: Don't wait to press on in the assignement. 

Waiting for direction from my mentor stopped me from working Sunday through Tuesday. That's half my work week.
I could have gotten much more done if I had been bold enough to do what I knew needed to be done.

#2: Working with props? Plan accordingly. 

- The box I was working with was merely posed in place during Blocking and Blocking plus. As soon as I began the transition into linear and splined curves the box began to show a life of it's own.
That's when I chose to constrain the box to a hand. This late choice took up most of my polishing time, and could have been prepared earlier if I had made that transition earlier; say after Blocking with story telling poses. 

#3: Tween Key is a tremendously helpful tool.

- Tween Key takes two neighboring key poses and invents a new key directly in between those first two. Allows a much quicker work flow. One thing I did overlook using the Tween Key was the definition in the feet. 

#4: Blocking Plus is the time to define the feet hands, pathways and arcs. 

- Instead of blindly in betweening keys it would have been more productive to analyze where those breakdowns were most needed to clarify the movement. 

Below are the earlier versions of my Box lift shot.


above: submitted week 3 Blocking Plus
below: Mid week Blocking Plus-Plus

And now for my 2nd Class 3 shot!...

Planning for next week: JUMP SHOT

Video Reference:

Thumbnails (Story telling poses)

More Thumbnails with a Shot layout image and costume description. 

Just for fun I traced the arcs during the fancy jump. Note the figure eight in the extending arm. 
Learned: Red Markers are the toughest to clean off my screen. 

Fun stuff in store this week. 
I'm excited for this shot, but still trying to find the balance with my current work load outside of animation.
Footloose the Musical is in full swing and is going very well. Now that we're in show mode there are less rehearsals and more time to animate. 
My Critical thinking Summer school class is also in full swing and expanding in the work load. This is the first class I can recall having to write a 10 page paper for. Love the content of the class. Do wish there was more time to absorb new information. 
My birthday was also this week. Felt lots of love from friends and family. I'm so grateful to have so many loving people in my life who accept me despite my schedule craziness. 

That's all for this week and thanks for stopping by,
--Max


Monday, July 9, 2012

Class 3 Weeks 1+2: A Little Pick-Me-Up

Hey There,

Well Class 3 is under way and after a Q+A swap I became a student of the amazing Mike Gasaway.

"Make something simple look complex."

These were words of advice for planning our first class 3 shot.

And so...bring on the Box Lift!

Index:
1. Video Reference
2. Thumbnails
3. Pre-Blocking
4. Blocking Pass (with Mike G's limit)
5. Outside Commitments

1. SO MUCH REFERENCE!

Some fun takes that I really enjoyed, but everyone's feedback recommended a heavier box, and the heavier the box the less fancy I could get with the takes. I kept filling the box with books until the box was so heavy, or I was so tired, that I could only perform a basic box lift.

Here's my selected reference:


- Some good use of traveling forward and back as well as side to side.
- Get to throw the box!
- Good for demonstrating weight, balance, and force.

2. Thumbnails

Simple drawing with specific notes on the movement
- Drawing the pathways of feet and hands was something I learned to include in my thumbnails.


3. Pre Blocking

Something I found useful,

a Blocking Pass with no timing.

The idea is that peers can easily flip through the keyframes and check the poses. This works because the AM Public review sections allow frame by frame flipping.

4. Blocking:

Mike Gasaway's instructions were to use only 8-12 different keys to tell our story. This limit was to get us thinking about Story Telling Poses, a unit more basic then key poses.

Some steps are missing, but I was able to focus on greater detail with less poses.


5. These first two weeks have been tough having to balance many different responsibilities. In addition to Animation Mentor I'm also taking a summer school course in reading and composition, playing the lead in a professional production of Footloose the Musical, and working as a designer and programmer for my college Marquee. Everything takes time, and some things have taken a backseat to larger priorities, but all in all everything has worked out pretty harmoniously. All my homework is getting done, my lines and dances are getting memorized, my work is on schedule, and my AM work is showing signs of improvement. 

I guess with everything going on, I needed a little Pick-me-up.

Thanks for stopping by.
--Max


Many thanks and gratitude to the AM Technical Support Staff.
This week wouldn't have happened without them.

Uhh...Houston, We have a problem.


Class 2 weeks 8-12 Just keep Pulling


I've been on break from AM for almost a week and it's time to get pumped.

What better way can that be done then to recap my last assignment from Class 2

Here's the final shot Submitted in Week 12


First Spline Pass

Blocking Plus 

Original Blocking

The most interesting things about the making of this shot were:

1. Keeping my ego in check when your Mentor's ideas are better then your original ones.
2. Exaggeration, Exaggeration, Exaggeration.
3. Playing to the camera.
4. Working in a cartoony style.

Looking at this shot and my previous dance shot, I realize, so far, I like my blocking passes better then my finals.
Something seems to get lost when I go into spline. It becomes smooth with very little texture, as apposed to blocking, which is naturally sharp and surprising.
It is very likely that what I'm seeing is me not attending to my timing and spacing, while trying to build appealing poses, and smooth transitions between poses.

This Term, Class 3, I will bring more attention to poses early on, so I can focus on the timing and spacing as my work progresses from blocking to animation.

Variety, texture, and entertainment value. Those are the goals.

Thanks for stopping by,
--Max


"Yeah, thanks for visiting. Next time bring milk."

Sunday, May 20, 2012

Class 2 Week 8: Animating is HEAVY business

Hello friends and friends of animation,

Last week was a pretty rough week, and this week it seems I thrive in that kind of pressure.

In this Blog (Index):
- Last weeks E-critique
- This weeks Distractions
- Revision of Dance Shot
- Last minute Panic
- Getting Organized
- New Planning Sketches
- 1st Blocking pass
- 2nd Blocking Pass
- What I learned this week
- New Maya Layout

In my ecritique I was given the advice to focus on reversing curves in this shot. since last week my planning was all very one note:
See.
This is what Scott Lemmer suggested. Like it? I do. : )
So what do I do with this information?...
I sat on it all week and let myself get swept up in other priorities:

1) Directing a scene from Farragut North for school
2) Rehearsals for Footloose the Musical
3) Making time for friends
and
4) Revising my shot from last week.
Scotts notes:
- Tone down the head bobs
- Make the last jump higher.

Course I waited till Saturday to get organized on my new shot, and I realized what was in my way.

I needed to redo my planning.

Now I think "duh!", but before, I felt I could simply change a few poses around. So I go back to my video reference and my keys that I selected (there's like 24 of them), and it also dawns on me how intricate my shot is (five little steps+ hand positioning) It looked super simple but to include every high, and low, of the hips, and each foot, and the head would take me more time and organization then I had given myself. 

So I made a list:

4:30-5:30: redraw Planning
5:31-6:30: Block Poses
6:31-7:30: Timing Pass
7:31-8:30: Dinner
8:31-9:30: Refine/ Fill in Poses and Timing

-After this I will always make a schedule before diving into work-

Here is my new Planning sketches:

That's it; one page, seven poses. 
Much more efficient and appealing then the 3 page- 24 pose- same curve planning from last week. 

What's more, I like the results.
Here's my Shot after an hour of Posing, and an hour for Timing: 


After dinner I was able to go back with fresh eyes, and refined by adding a few anticipation poses (and changing the background to a warm olive green):


This week I learned:
- It's okay to back track
- Good planning makes a good shot
- Schedule your time to get the most out of it.
- Always draw over planning sketches in dark pen if you want it to show in the picture.
- Variation is appealing
- Sometimes in Planning and Blocking "less is more."
- For me, putting aside 2-3 solid hours for work is better than 6 days of scattered work time.

I also found a layout that worked for me:
Left Camera:
-"Shot camera"
- Locked
- Curves are hidden
- Grey Frame
-Info Bar

Right Camera:
- "Work Camera"
- Movable
- Visible curve.
- Where I make all the pose adjustments.

When I get into animation I'll open up a third panel on the bottom for the graph editor.

Thanks for reading,
Looking forward to next week,

--Max

Monday, May 14, 2012

Class 2: Week 5, 6, & 7 "Dancin' Fever"

Ok, so our second assignment for class two is now complete.

Here you can see the evolution of my Dancing Fever shot.

Week 7: Final

Week 6 Blocking Plus

Week 5: Blocking

What I learned this Assignment.

Have faith in your shot, and keep moving forward.
- In the last week of the shot I was feeling done with my shot, and not because I'd done as much as I could do, but rather because I was overwhelmed by all the things I had to do. Thinking of my shot was painful. I felt that nothing I did would make a big difference and that the mistakes I'd made were deeply rooted in the basic steps. I resolved to simply do the minimum. Address the notes from last weeks ecritique and turn it in popping and jittering. Take as low a grade as I've ever gotten, and get started on my next shot. However the  guilt and shame I felt abandoning my shot like that hurt more then the weight of fixing it would be. So I dig down deep and did what I could. It's not perfect but I made it and I didn't give up. That's something to be proud of. 

Exaggerate, what you see.
- My notes for the first and second weeks had a lot of the same critiques:
---Exaggerate, the up and downs (Y translation)
---Exaggerate the curves of the torso
---Go higher
---Go farther to the side.
-I'll continue working on creating strong and appealing exaggeration. 

Smooth arcs make a Big difference.
- One of the things I got in my ecritique was to address a specific arc. Once that was addressed I continued to do a whole "Arc Pass" of the shot. That and addressing all the foot planting, and graph overshoot. Those simple steps took my shot to a whole new level and were so worth it in the end.

If you want to make an "S" curved pose keep the torso in a "C" curve, using the head and legs to make the "S" rather then snaking the body.
-Honestly I'm glad I got this note from my mentor, the movement looks much more natural and organic. Also I want to remember that snaking the body though not always appropriate had great appeal to me while I had it in the shot, and I will keep that in my tool belt as well as Scott's tool of Torso C.

Planning starts with an idea.
-Getting started on my next shot, a Heavy box pull, I did the most logical thing for a student to do. I turned on a camera and started filming myslef pushing some chairs without a clue as to what I actually wanted to do. Of course once I got that on the computer and started to analyse it, it was clear that the reference I had shot was bland and sloppy. Recognizing this, I decided to make a three word story arc, 
"Assess"
"Attack"
"Re-assess"
this would illustrate how I wanted to film my reference, and gave me a basic framework for how to approach the shot and build an entertaining story. 
That video reference was much better and funner to film. However once I got that to the computer, I found all my passes were to long in terms of frame rate. (I was mistaken thinking the shot was 100-200 frames when it's 100-250) So, I went to youtube and found a great video to reference instead. 
- Still planning out a shot on paper before getting up and "doing" it will be a huge part of my process I'm sure.

Here's My planning for Next Weeks Shot: "Heavy Pull"


And here's the reference video I found on youtube.
and here's the sight were I got the tools to download youtube videos, and convert them into quicktime.Youtube Downloader

In the spirit of not giving up I was up till 3am Saturday night/ Sunday morning just to get this work done.
(Of course if I'd planned ahead that wouldn't have been necessary) ; )

Completing this dance shot has given me a renewed sense of pride and achievement and a renewed sense of humility. I plan to keep the box pull simple and of a high quality. 

Thanks for stopping by, and I'll talk to you soon. : )
--Max

Sunday, April 22, 2012

Class 2 - Weeks 3 + 4

So far so good.

My Mentors advice to keep our shots simple is really helping me to dig into the material and grow.

I'm very happy with the improvements in my work, and am inspired to continue this development.

The positive feedback I've been getting is so encouraging, and has nothing to do with the complexity of my shot but all to do with the quality, which is even more rewarding.

So a recap of the last 2 weeks:
Week 3: Side Step - Blocking Plus

Week 4: Side Step - Polish and Clean to Final
and
Start planning for next shot!

Here's my submitted work for Week 3.
The moment when this became something I was proud of was after I took the time to refine the timing using logic to space the keys.
Before I had been going off of my video reference timing with a few minor changes to up the appeal.
When I re-timed the whole thing, however, the shot gained a new life.

Mentor Notes:
- Pushing Poses
example from ecritique:

Here's my submitted final animation for Week 4, using my Mentor and Peer feedback.

Some weirdness still in the knees at least but overall I'm really happy with the progress that happened through out this assignment.

Preview for Next week- Week 4 Planning

Reference Video:
PS - This Choreography came from an audition I went to earlier that day for a production of Baby the Musical.


and Sketches:

     Page 1 Page 2Page 3

I wonder if this shot will be more complex then I realize. Choosing a dance is based on my past on stage as well as our lecture for the week used a dance shot to demonstrate new animation workflow, and I want to use these new techniques. Having a similar shot may help use the similar workflow and broaden my tool belt to handle different kinds of shots in different ways.

Thanks for checking in,
Talk to you soon.
--Max

PS
Also going on this week, I opened a new show. "The Pajama Game" a musical presented by the Local Jewish Federation. I'm double cast as the lead and switch to ensemble in alternate shows.

Here are a couple Pics of me as the lead, Sid Sorokin, the new superintendent of the Sleep Tite Pajama Factory. Half of a budding romance caught in the rising tension of a union war between management and workers over a 7 1/2 cent pay raise.


First Day on the job, repairing a broken machine

"Hey There"- my don't fall in love song.

The Sleep Tite Company Picnic

An intimate moment between Sid and Babe, the romantic couple

"I love you mooooooore!"

Thanks for checking these out,
Happy Animating. : D
--Max